
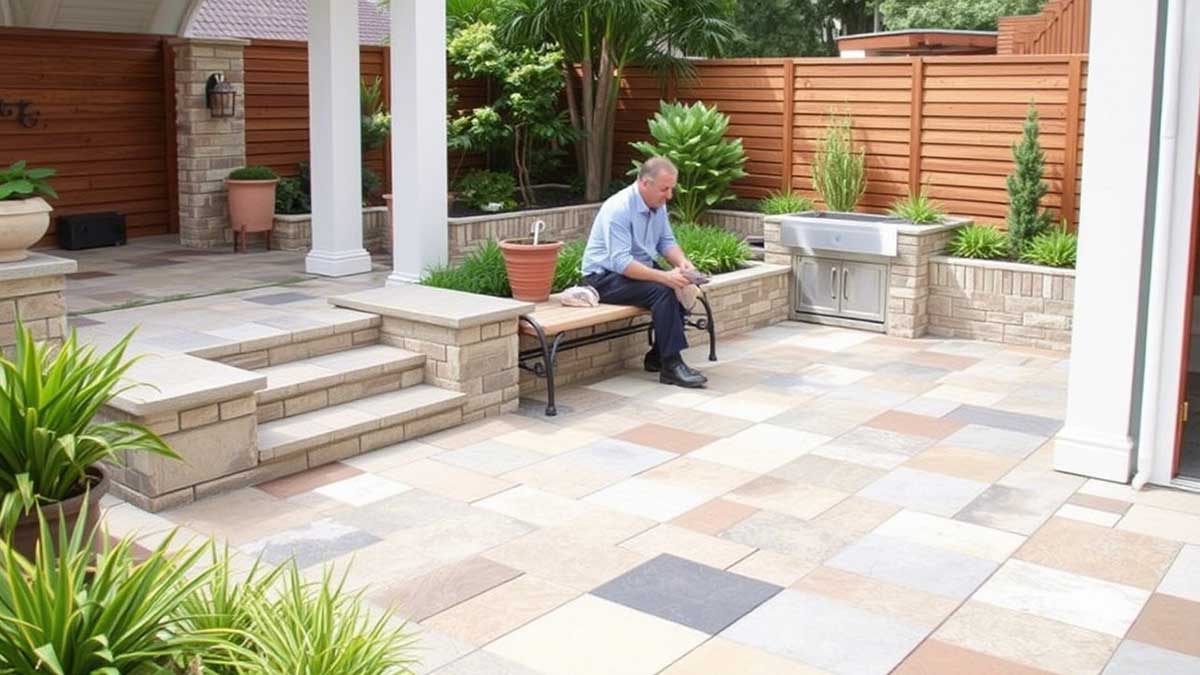
Installing tiles outdoors requires more than just good taste in design—it demands planning, material knowledge, and awareness of environmental conditions. The outdoors presents unique challenges such as temperature fluctuations, moisture, and direct sunlight. Whether you’re tiling a patio, balcony, garden path, or pool area, the following guide covers the essential do’s and don’ts for a successful and durable outdoor tile installation.
Why Outdoor Tile Installation Is Different
Unlike indoor tiling, outdoor tile installation is exposed to the elements. This means the tiles and adhesive must withstand:
- UV rays
- Heavy rain
- Frost and freeze-thaw cycles
- Temperature fluctuations
- Foot traffic and sometimes even vehicles
Improper material selection or installation techniques can lead to cracked tiles, water damage, or even safety hazards due to slippery surfaces.
✅ DO: Choose Weather-Resistant Tiles
When it comes to outdoor tile installation, always choose tiles rated for outdoor use. These are typically porcelain, natural stone, or quarry tiles. Outdoor tiles are specifically engineered to handle harsh weather conditions.
Top choices:
- Textured porcelain (non-slip)
- Slate (natural look)
- Granite (durable and stylish)
Avoid ceramic tiles unless they are specifically rated for outdoor use.
❌ DON’T: Use Glossy or Smooth-Finish Tiles Outdoors
Glossy tiles may look beautiful indoors, but they can become dangerously slippery when wet. For any outdoor tile installation, opt for tiles with textured or matte finishes to reduce the risk of slipping.
Pro tip: Always check the tile’s slip rating (R rating) before purchasing for outdoor use.
✅ DO: Prepare a Solid Foundation
The key to any long-lasting outdoor tile installation is a solid, stable base. Outdoor surfaces often shift due to soil movement or temperature changes. A reinforced concrete base or a properly leveled substrate with a suitable membrane is essential.
Best practices:
- Use a concrete slab with expansion joints
- Apply a waterproofing and crack isolation membrane
Neglecting this step can lead to costly repairs down the line.
❌ DON’T: Install Tiles Directly Over Grass or Dirt
Outdoor tiles need a flat, stable base. Installing tiles over grass, dirt, or uneven surfaces will result in loose tiles and early failure. Always remove organic material and build a proper substructure before tile placement.
Solution: Use a gravel and sand base or concrete slab, depending on the project type.
✅ DO: Use Exterior-Grade Adhesives and Grout
For a secure outdoor tile installation, you must use adhesives and grouts that are specifically formulated for outdoor use. These products are resistant to water, frost, and UV exposure.
Recommended materials:
- Thin-set mortar rated for exterior conditions
- Epoxy or polymer-modified grout
Also, ensure full coverage of mortar beneath the tiles to avoid air pockets.
❌ DON’T: Forget About Drainage
Outdoor areas are prone to water accumulation, especially during heavy rains. Without proper drainage, water can seep under the tiles and cause loosening or mildew growth. Always plan for a slope (usually 1-2%) away from the structure to allow water to run off.
Drainage solutions include:
- Sloping surfaces
- Drain channels
- Permeable tile systems
✅ DO: Seal Natural Stone Tiles
If you’re using natural stone like slate, travertine, or granite in your outdoor tile installation, it’s crucial to seal them. Outdoor conditions can cause natural stone to fade, stain, or erode over time. Sealing protects the surface and prolongs the tile’s life.
Maintenance tip: Reseal the surface every 1-2 years depending on exposure.
❌ DON’T: Overlook Expansion and Movement Joints
All materials expand and contract with temperature. Failing to include expansion joints in your outdoor tile installation may lead to cracked tiles and grout lines. Movement joints allow for natural expansion and prevent surface stress.
Where to include them:
- At perimeter edges
- Every 8-12 feet in large tiled areas
Use flexible sealant in these joints to allow for movement.
✅ DO: Plan for Seasonal Maintenance
Outdoor tiles, especially in extreme climates, require regular maintenance. Clean your tiles periodically to remove debris, moss, or algae. Inspect grout and joints annually and make repairs as needed to extend the life of your outdoor tile installation.
Simple maintenance checklist:
- Clean surfaces with mild detergent
- Check for loose tiles or cracks
- Reseal stone surfaces annually
❌ DON’T: Ignore the Tile Layout
Tile layout matters. Poor planning can lead to unattractive cuts, awkward transitions, and uneven edges. Before starting your outdoor tile installation, dry-lay your tiles to visualize the layout and make adjustments.
Layout tips:
- Center tiles along the main view axis
- Minimize small edge pieces
- Use spacers for even grout lines
Real-World Applications and Mistakes to Avoid
Example 1: A homeowner tiled their front porch using high-gloss ceramic tiles. Within the first rain, the surface became dangerously slippery. Replacing them with textured porcelain resolved the issue.
Example 2: A garden walkway was installed over a dirt path. Within six months, the tiles shifted and cracked. Reinstallation with a gravel base fixed the foundation problem.
These scenarios show why understanding do’s and don’ts in outdoor tile installation is crucial to success.
Final Thoughts
Outdoor tiling projects can add beauty, value, and function to your property—but only if they’re done correctly. Using the right materials, following best practices, and avoiding common mistakes ensures your outdoor tile installation will stand the test of time.
From patios to pool decks, let these guidelines be your blueprint for success. Plan thoroughly, choose quality products, and never underestimate the power of proper preparation.
With the right approach, your outdoor tiled space will not only look amazing but also endure the elements for years to come.